STEP BY STEP
Installation Guide
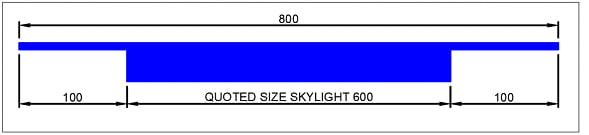
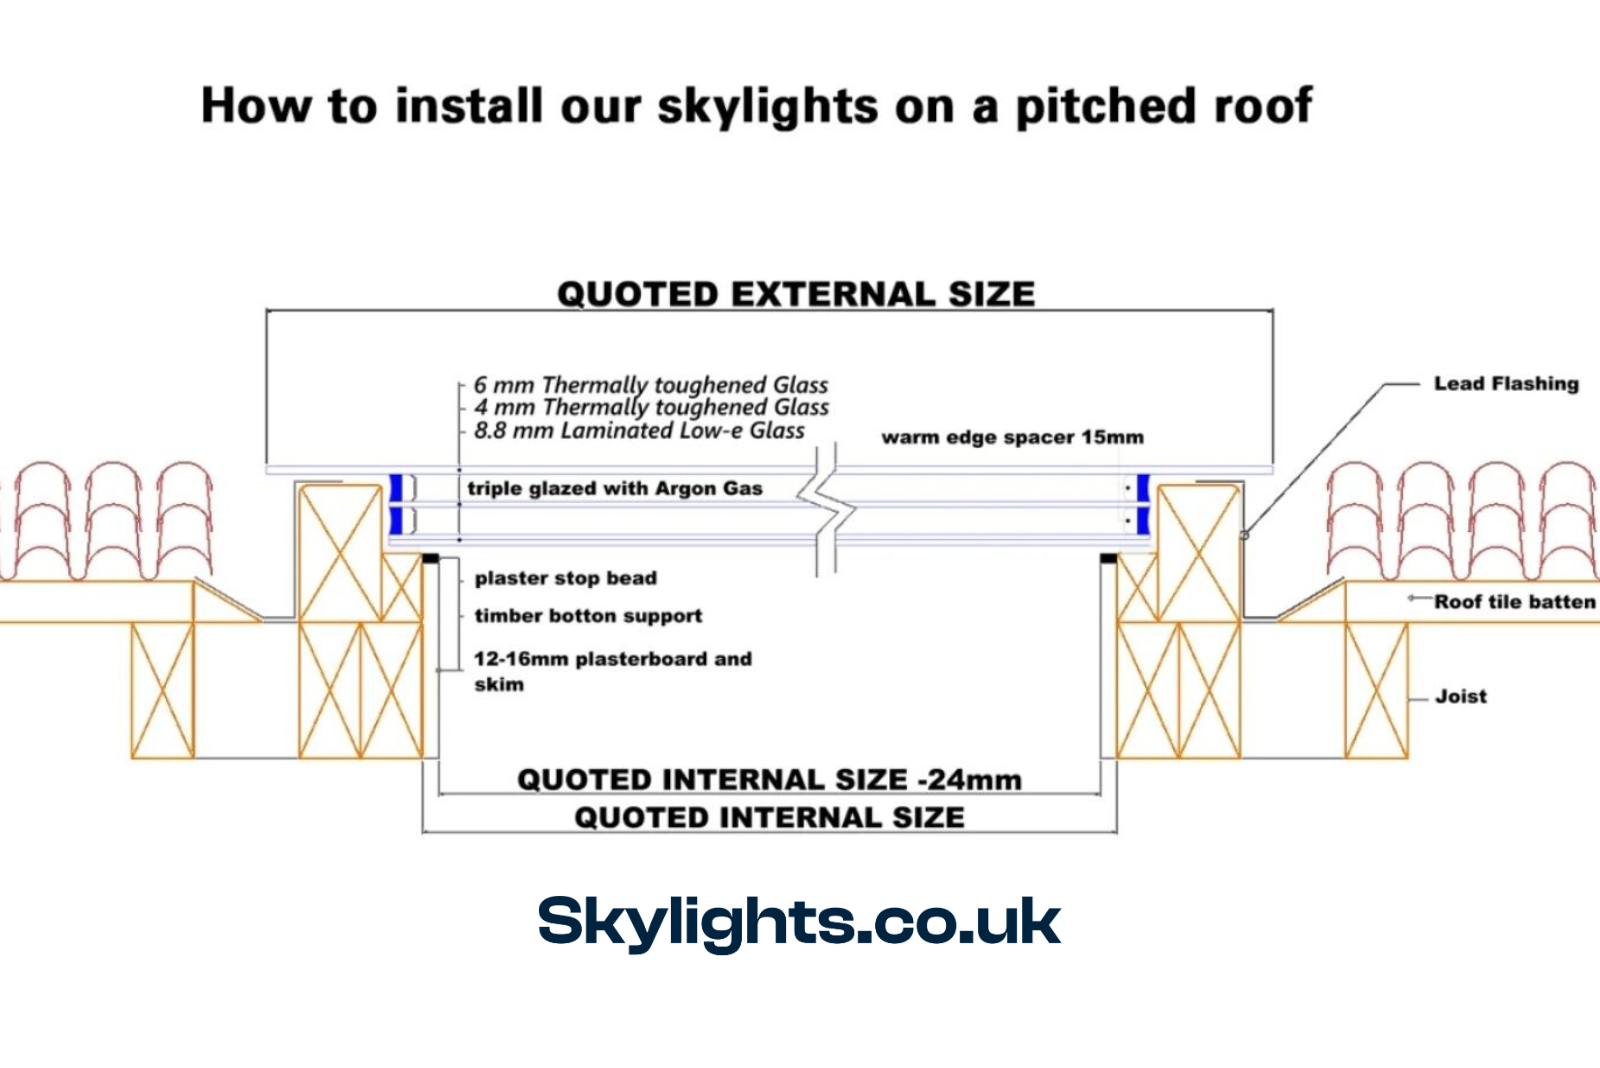
Considering that our skylights’ dimensions refer to the size of the bottom (internal) glass panel and that the top panel is stepped by 100mm on each side, the overall externally visible size is 200mm larger in both directions.
For instance, in this guide, we’ll show you how to install a 600mm x 600 mm Skylight. In the gallery for each size, we provide installation sketches for other sizes separately.
The 600x600mm DOUBLE/TRIPLE GLAZED SKYLIGHT comes with the following sizes:
Your upstand should stick out at least 150mm above the roof level.
To avoid water collecting in the middle of the glass panel, a minimum pitch of 8-10 degrees relative to the horizon is needed (that means a 10cm fall for every metre of Skylight). Before applying the silicone, run a water test to ensure the water isn’t pooling (glass can still bend in the middle).
Your upstand opening should leave 5mm wiggle room on each side:
The internal distance from upstand to upstand should be 10mm more than the quoted skylight size
(in our example: 610mm by 610mm)
Skylight Support – provided By the builder
The Skylight support is a 25x50mm (2”x1”) timber:
Set up the support so that the top of the support is: -Triple Glazed Skylight – 48mm below the top of the upstand
Weather the upstand
Cover the external face and top of the upstand with roof covering material:
Once you’ve finished weathering the upstand, you’re ready to install the Skylight.
Ensure all surfaces where the silicone will be applied are clean of dirt, dust, moisture, etc.
1. Apply the foam rope on top of the 2”x1” timber support to level off any irregularities which will prevent any pressure and stop cracking on the bottom glass laminated pane. THE WARRANTY WILL BE VOID IF A FOAM ROPE IS NOT USED.
2. Apply a generous amount of weatherproof sealant on top of the upstand. Usually, one tube covers six linear metres.
3. Lower the skylight with suction cups, evenly distributing the weight across the cups.
4. Apply waterproof sealant on the underside of the overhang and smooth it over again to ensure a watertight seal.
For a pitched roof, please follow the technical diagram provided:
*Regarding the silicones, we suggest the following products:
Black weather silicone – DOWSIL 791 Weatherproofing Sealant
DO NOT USE ACRYLIC SEALANTS!
Ensure you’re using the right silicones to install and weather-tighten your Skylight. We recommend the above products as they are fully compatible with our glazing unit silicones.
Using the wrong silicone can lead to discolouration, adhesion loss, and potential leaks due to chemical incompatibility. It may also lead to depressurization of the glazing unit (allowing moisture to penetrate inside and cause internal condensation), weak bonding to the support structure, and poor weather tightness.
THE WARRANTY WILL BE VOID IF A FOAM ROPE IS NOT USED AND NOT PURCHASED FROM US.